
Security Camera Placement Tool for Effective Surveillance Design
Indoor & Outdoor Security Camera Placement Tool: A Superior Solution with IP Video System Design Tool
Welcome to the most efficient security camera placement tool designed to help you plan and optimize your surveillance system. Whether you’re securing your home, office, or a larger property, our layout planner allows you to create precise, customized plans for both indoor and outdoor camera setups. In just a few easy steps, you can visualize your security system and ensure complete coverage. Start designing your system today and feel secure knowing that you’ve made the right choice for your property.

How to Use the Security Camera Layout Planner
Steps to use the IP Video System Design Tool
Step 1:
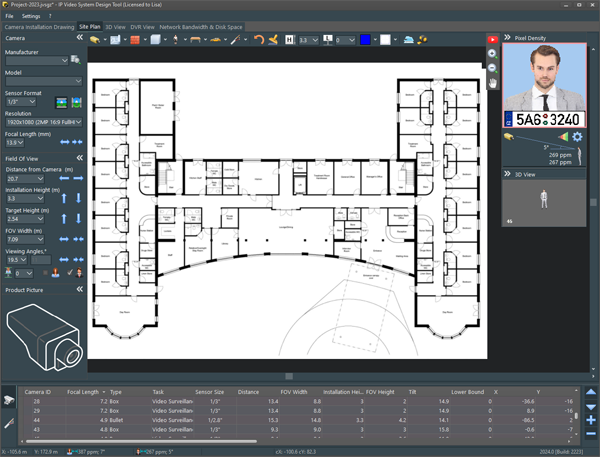
Add Site Plan
Start by uploading a site plan or selecting an area directly from Google Maps. You can easily customize your plan by adding walls, windows, furniture, and even 3D models of cars and people, ensuring a realistic representation of your space for accurate camera placement.
Step 2:
Add Cameras
Position cameras on the site plan and designate the areas to be monitored, such as entrances, windows, parking lots, and terminals. Use color-coded zones for each camera’s purpose:
- Identification (Pink) – Capture high-resolution details for recognition.
- Recognition (Yellow) – Capture general features for basic identification.
- Observation (Dark Green) – Monitor large areas for activity detection.
- Detection (Light Green) – Detect motion or events in specific zones.
Step 3:
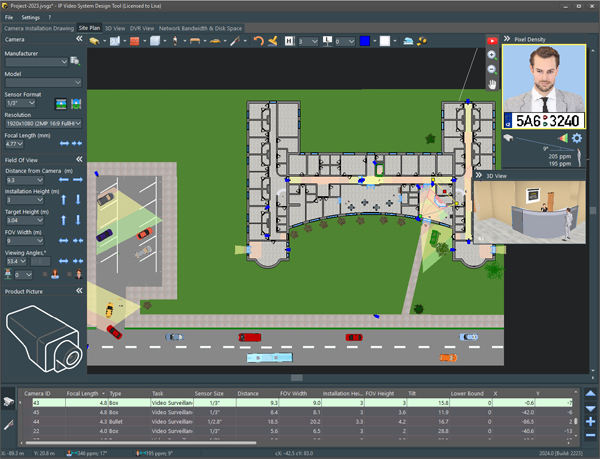
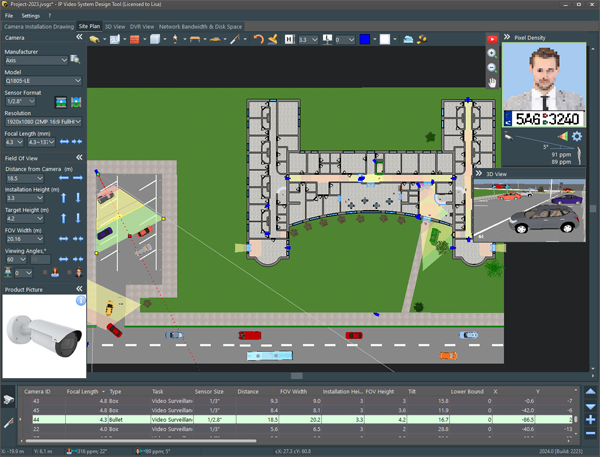
Select Camera Models
From a large camera database, select the model that best fits your needs. Simply choose a camera based on the parameters you set in the previous step, and you’ll see a collection of camera models that align with your needs.
Step 4:
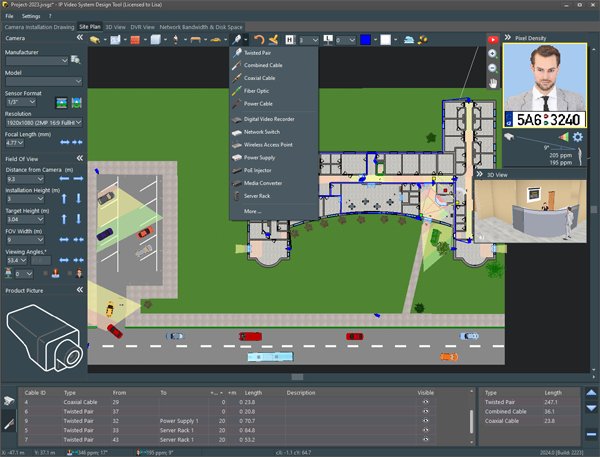
Add Cables
Include cables and any necessary security surveillance equipment.
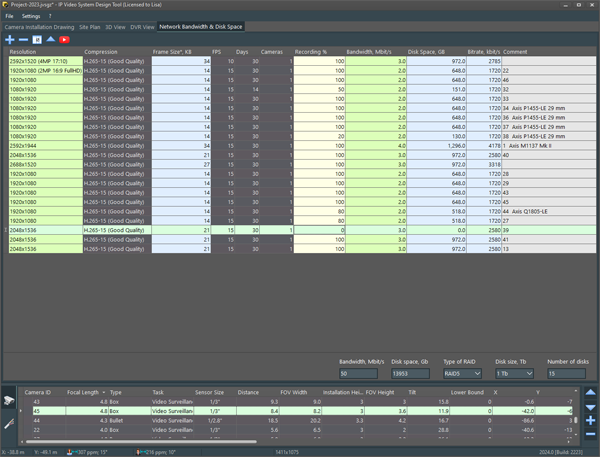
Step 5:
Estimate Network Bandwidth and Storage Needs
To calculate the network bandwidth and storage needs for your video archive configuration, click on the list of cameras on the floor plan and select “Copy to Bandwidth and Disk Space”. The software itself calculates network bandwidth and storage.
Step 6:
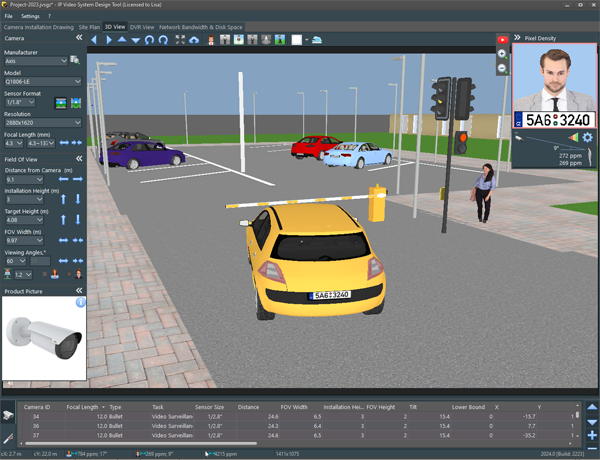
Preview Your Camera View in 3D
Visualize exactly what your cameras will capture after installation with our advanced 3D simulation feature. The tool allows you to simulate various environmental conditions such as fog, low light, nighttime, and poor visibility, helping you fine-tune camera angles and placement for maximum coverage.
Step 7:
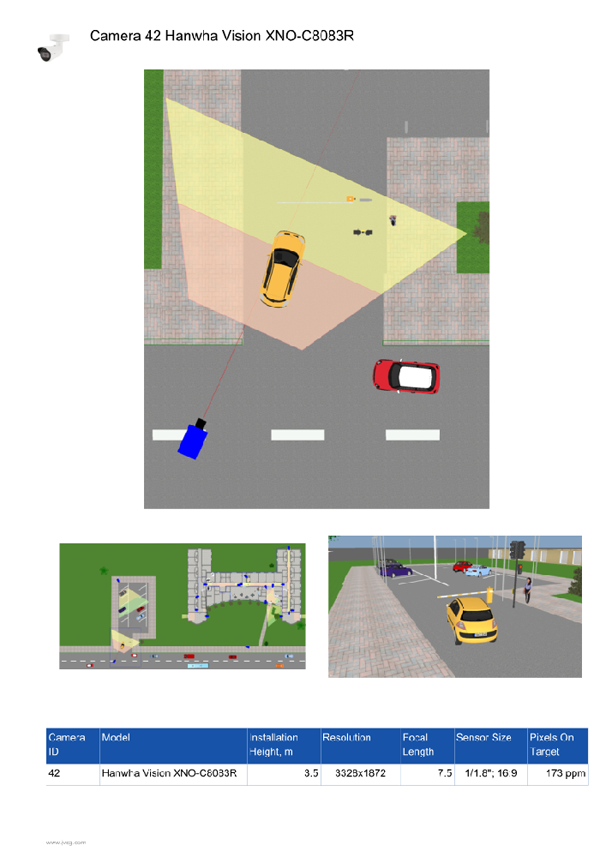
Export your professional report to impress your clients
Once your layout is complete, our tool creates detailed, professional reports that showcase your security camera design and system specifications. These reports will help you present a clear, well-structured proposal to clients, positioning you as a trusted expert in security system design.
The IP Video System Design Tool is a comprehensive solution for all your security camera placement and surveillance design needs. With its easy-to-use interface, advanced features, and detailed reporting capabilities, our tool provides everything you need to design and implement an effective security system. Start using it today and elevate your next project with professional-grade results.
See also:
CCTV Lens Calculator
Video surveillance design software